rigify
INSTALLING RIGIFY
Rigify is already included in Blender and you activate it (almost) as any other addon.
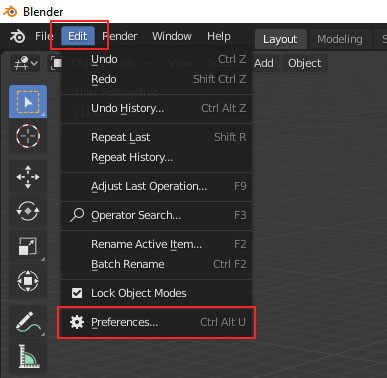
From the main Blender menu click Edit > Preferences
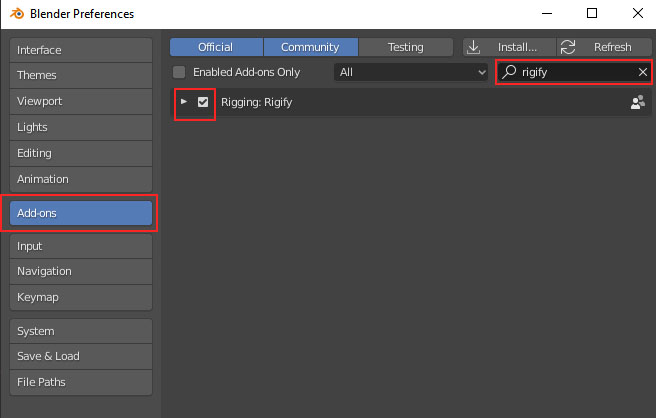
Go to the addons tab. In the search field type Rigify. Put a check-mark next to “Rigging: Rigify”.
With that the addon is active and ready for use. But there is one more step that you need to take to make sure that Rigify runs smoothly. Go to the Save&Load tab and activate Auto Run Python Scripts.
What happens after Rigify has been activated?
After activation, this addon adds several new menus scattered throughout Blender’s interface. This is a personal pet peeve of mine. If the addon was better organized it would be easier to make these tutorials 🙂 We’ll gradually explore all Rigify options and learn where to find them.
RIGIFY WORKFLOW
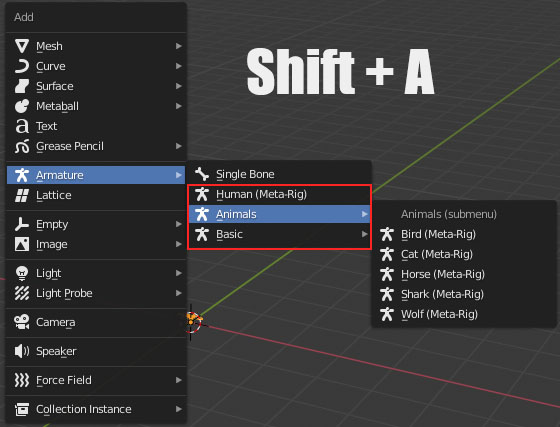
When you press Shift+A in Blender’s 3d view you’ll see a few new rig types under Armature.
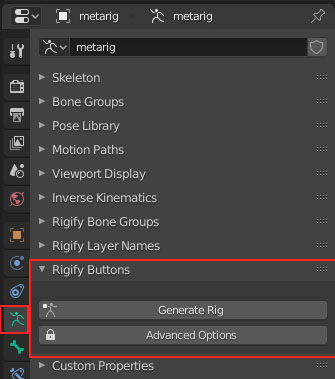
In the Properties Panel > Armature Tab (aka Object Data Properties) you’ll see the Generate Rig button. Below it there is a button which says “Advanced Options” which contains addition


